Set Up a Test Environment
Fluxir uses a single environment for its API: production. However, you can safely test your integration using a test account that prevents the creation of real data.
This guide shows you how to create a test account in Fluxir, enabling you to validate your integration before moving to production.
Creating your Test Account
Follow these steps to create a test account and start using the API in test mode:
-
Visit the registration page at https://app.fluxir.com/account/register.
-
Select to register as a Company account. This ensures you have access to the API features.
-
Complete all required fields in the form.
-
Check the box labeled I wish to create a test account. This tells Fluxir that the account is used for testing only.
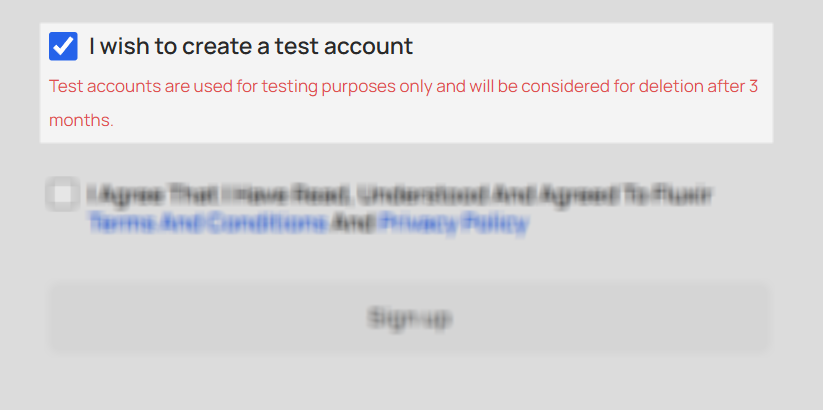
When this box is checked, the data you submit via the API won't be stored as real operational data. You can safely use this mode to simulate API workflows.
-
Review and agree to the Terms and Conditions and Privacy Policy.
-
Click Sign Up to complete the account creation process.
-
After registration, follow the Authentication guide to generate your API credentials and begin making test API requests.
Although Fluxir provides only a single production API endpoint:
https://api.fluxir.com/
you can safely test your integration using a designated test account. This allows you to verify your API calls and workflows without affecting real data.
Currently, there is no way to convert a regular account to a test account after registration. You must register a new account and check the I wish to create a test account box during the sign-up process.